Difference between revisions of "Screenshot Recreation"
(Removed improper category and placed in Maintenance. Page is unfinished and misformatted. Note: Can we get a maintenance subcategory for formatting issues, please?) |
(Updated some of the pages writing and formatting. TODO: Everything from "Hammer" onward needs to be rewritten.) |
||
| Line 3: | Line 3: | ||
[[Category: Half-Life 2]] | [[Category: Half-Life 2]] | ||
[[Category: Maintenance]] | [[Category: Maintenance]] | ||
| + | |||
| + | The ability to accurately swap between original screenshots released by Valve and the exact equivalent locations of each screenshot's given map allows for artists to find otherwise unnoticed details that they may miss when attempting to recreate an asset. As such, being able to find the exact positions and angles that official screenshots were taken at can be a worthwhile venture. The following are examples of official screenshots and their equivalent in-game locations. | ||
| + | |||
== Examples == | == Examples == | ||
| + | <gallery mode="slideshow" hideaddbutton=true widths="200" spacing="small" position="center" bordersize="small" captionsize="small"> | ||
| + | File:2001 c1a3a port.gif|c1a3a_port | ||
| + | File:C1a3a port.gif|c1a3a_port | ||
| + | File:Borealis 01 full.gif|borealis_01_full | ||
| + | File:Hltv.gif|borealis_01_full | ||
| + | File:Soldiers2.gif|d3_borealis_05 | ||
| + | File:Zombie anim.gif|d3_borealis_05_005 | ||
| + | </gallery> | ||
| − | + | d1_borealis_01_full (noclip, 1024x768): setpos 540.532837 -157.764374 -198.184235;setang -1.157436 153.446045 0.008447<br> | |
| − | + | 2001_borealis_hltv (1600x960(?)<ref>The exact resolution needs to be specified in the launch options.</ref>): borealis_01_full or borealis_003, no coordinates available.<br> | |
| − | + | soldiers (noclip, 1024x768): d3_borealis_05: setpos 474.040497 352.175690 -231.272766;setang -5.733209 220.825195 0.000001<br> | |
| − | + | zombie (2048x1536): d3_borealis_05_005: setpos 609.607422 102.029625 -255.968750;setang -6.403040 194.886475 -0.000071<br> | |
| − | + | c1a3a_port with soldiers: fov 90; setpos -867.965271 -1092.916748 288.031250;setang 37.437645 160.565186 0.000000<br> | |
| − | + | valvetime c1a3a_port (noclip): fov 90; setpos -334.547333 -2934.202881 309.520599;setang 29.903189 288.775635 0.000000<br> | |
| − | |||
| − | |||
| − | |||
<span id="making-your-own-screenshot-recreations"></span> | <span id="making-your-own-screenshot-recreations"></span> | ||
== Making your own Screenshot Recreations == | == Making your own Screenshot Recreations == | ||
| − | Creating screenshot recreations requires a tool that can overlay separate windows with transparency, or a way to seamlessly change between windows. | + | Creating screenshot recreations requires a tool that can overlay separate windows with transparency, or a way to seamlessly change between windows. Glass2K for Windows is one such tool. It allows for the user to overlay screenshots onto their screen, thereby allowing said user to align their view to be the same as the original screenshot. |
| − | |||
| − | |||
<span id="hammer"></span> | <span id="hammer"></span> | ||
| Line 66: | Line 72: | ||
<span id="prior-work"></span> | <span id="prior-work"></span> | ||
| − | == | + | == References == |
| − | |||
| − | |||
| − | |||
| − | |||
| − | |||
| − | |||
| − | |||
| − | |||
| − | |||
| − | |||
| − | |||
| − | |||
| − | |||
<references /> | <references /> | ||
Revision as of 07:07, 16 August 2023
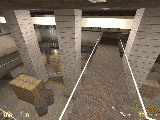
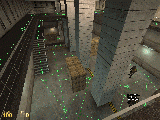
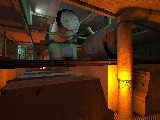
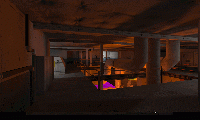
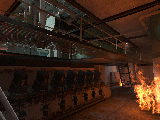
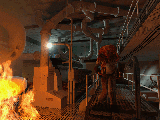
The ability to accurately swap between original screenshots released by Valve and the exact equivalent locations of each screenshot's given map allows for artists to find otherwise unnoticed details that they may miss when attempting to recreate an asset. As such, being able to find the exact positions and angles that official screenshots were taken at can be a worthwhile venture. The following are examples of official screenshots and their equivalent in-game locations.
Contents
Examples
d1_borealis_01_full (noclip, 1024x768): setpos 540.532837 -157.764374 -198.184235;setang -1.157436 153.446045 0.008447
2001_borealis_hltv (1600x960(?)[1]): borealis_01_full or borealis_003, no coordinates available.
soldiers (noclip, 1024x768): d3_borealis_05: setpos 474.040497 352.175690 -231.272766;setang -5.733209 220.825195 0.000001
zombie (2048x1536): d3_borealis_05_005: setpos 609.607422 102.029625 -255.968750;setang -6.403040 194.886475 -0.000071
c1a3a_port with soldiers: fov 90; setpos -867.965271 -1092.916748 288.031250;setang 37.437645 160.565186 0.000000
valvetime c1a3a_port (noclip): fov 90; setpos -334.547333 -2934.202881 309.520599;setang 29.903189 288.775635 0.000000
Making your own Screenshot Recreations
Creating screenshot recreations requires a tool that can overlay separate windows with transparency, or a way to seamlessly change between windows. Glass2K for Windows is one such tool. It allows for the user to overlay screenshots onto their screen, thereby allowing said user to align their view to be the same as the original screenshot.
Hammer
You might benefit from my guide on opening Leak maps in Hammer++, and my VMF updater mappack. The updated maps will require less effort to fix up compared to the unmodified WC mappack maps.
Before you can create a screenshot recreation, you need to have a (close enough) version of the map shown available. Thus, the first step is to canvass the maps that seem to roughly match the one the shot was taken in until the closest one is found.
I would advise for comparisons to not use fast compilations. This means compilation time can chug - but if we use a cordon to remove everything the player can’t see from the screenshot’s angle, that’s not a problem.
The map may already have a cordon - click “Edit Cordon” to interact with it, and “Enable Cordon” to activate it. In order to accurately determine what the player can see, you can drag-select (Hammer++ only) everything in the 3D viewport, and put the cordon around what is selected.
HL2
Enabling noclip is a must. Many screenshots use it, even if it doesn’t look like it. Further, noclip “snaps” to the ground to a certain degree, meaning it can even serve as a more precise way to “walk”.
Valve’s screenshots use both fov 75 and fov 90. If you can’t seem to get the rough look of it right, try changing it between these two, or others.
Getting it Right
An important aspect of getting the alignment right is being able to increase your precision of movement as you get it closer. These commands are important for it:
- sv_noclipspeed
- sensitivity
For further degrees of freedom in movement, you might want to bind a key to +moveup and +movedown. This allows you to adjust your vertical position without losing your view angle.
It’s easy to get myopically focused on comparing one area of the screenshot. Avoid this! If you are looking at one area, it’s easy to let another slip. Try to get 3 or so different areas across the screenshot roughly there. Then, you can perfect one, perfect the other, fix any issues with the first, and repeat this for the third.
As adjustments become more precise, you might want to compare the screenshots directly and plan out where you want to move. Simply unconsciously adjusting might leave you further away from accuracy than you were.
There is never perfect perfection, but if you can get it to the point where the screenshot stops “moving” between the comparisons, that’s quite enough.
Before you finish, type getpos to save your position. If you’re feeling nice, bundle it with your comparison to make it easier for succeeding users to get back where you were.
To GIF
Paint.NET: [I’ve been using this]. I set the “Delay” to 500 when saving, and set the loops to 0 (why should it stop animating?). This maintains the limitation of the 256 color palette, but is still useful.
I use ezgif.com. Put both of the parallel screenshots together and then set the “Delay” to 50. Feel free to suggest something better. I prefer there be no blending frames between the two screenshots, because it makes it more difficult to spot differences.
References
- ↑ The exact resolution needs to be specified in the launch options.
