Compiling Leak maps with Retail Hammer: Difference between revisions
oldwiki>Livelong2 (tmp2) |
oldwiki>Livelong2 (yeah idk but this isn't workin) |
||
| Line 26: | Line 26: | ||
Leakhammertut s2 m1 2.png | Leakhammertut s2 m1 2.png | ||
</gallery> | </gallery> | ||
After that, select | After that, select the "New" button. | ||
<gallery widths="310" position="center"> | |||
Leakhammertut s2 m1 2.png | |||
</gallery> | |||
Method 2 - Outside Hammer | Method 2 - Outside Hammer | ||
Revision as of 17:18, 27 July 2017
Mapping for the leak is a very challenging task to setup, and the resources for making the leak hammer function are often hard to follow. What's an alternative to using the leak's hammer? Making the retail hammer run the leak's compilers.
Requirements
- You should have a Valve game that has the retail hammer installed beforehand. The Source SDK's tends to not work right, and I cannot advocate for it functioning at all.
- You should have the leak unpacked on your hard drive somewhere.
- You should at least a basic understanding of hammer.
- You should have the latest revision (or the revision I used, present in the files' Misc folder) of LeakNet installed. (It technically isn't necessary, but I can't guarantee it will work correctly without it)
Part 1 - File Moving
Before we do anything else, we should make sure that all of the files are in the right places. Go to here, and go to the "Part1" subfolder.
- Move "lights.rad" to anon-hl2/bin/.
- Move "gameinfo.txt" to anon-hl2/hl2/.
Part 2 - Gameinfo setup
Method 1 - Within Hammer
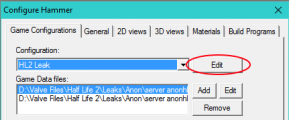
After opening Hammer, go to Tools > Options. A window named "Configure Hammer" should open.
Go to the first "Edit" button on the side of the window.
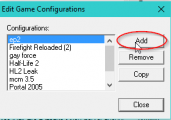
Then, press "Add" to add another Hammer configuration.
After that, select the "New" button.
Method 2 - Outside Hammer
Within your hammer's folder (or the main bin folder of the game you are using hammer from), there is a text document named gameinfo.txt.
Open this.

