Compiling Leak maps with Retail Hammer
Mapping for the leak is a very challenging task to setup, and the resources for making the leak hammer function are often hard to follow. What's an alternative to using the leak's hammer? Making the retail hammer run the leak's compilers.
Requirements
- You should have Half-Life 2 installed.
- You should have the leak unpacked on your hard drive somewhere.
- You should have at least a basic understanding of hammer.
- You should have the latest revision (or the revision I used, present in the files' Misc folder) of LeakNet installed.
Part 1 - File Moving
Before we do anything else, we should make sure that all of the files are in the right places. Go to here, and go to the "Part1" subfolder.
- Move "lights.rad" to anon-hl2/bin/.
- Move "gameinfo.txt" to anon-hl2/hl2/.
Part 2 - Gameconfig setup
Method 1 - Within Hammer
Step 1 - Creating the config
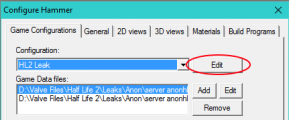
After opening Hammer, go to Tools > Options. A window named "Configure Hammer" should open.
Go to the first "Edit" button on the side of the window.
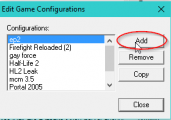
Then, press "Add" to add another Hammer configuration.
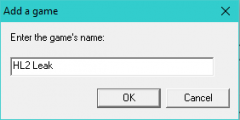
After that, type in whatever you want your leak compilation config to be.
Finally, go to the dropdown menu to select the config you just made to begin setting it up.
Step 2 - Directories
This is where having the hl2 leak available is required, as we will be pointing to various directories in it.
Tip - The directory selector can be annoying to work with, beforehand you may want to navigate to anon-hl2, to copy-paste the directories into the boxes.
Important: Make sure that the directories you put in do not have ending slashes. Otherwise, the game configuration window will not display.
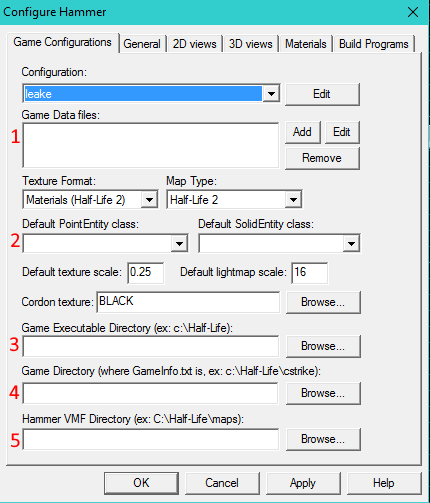
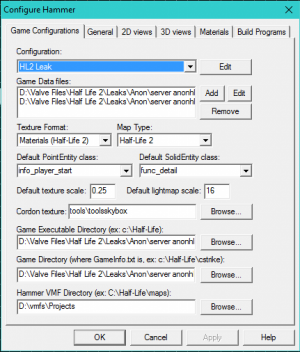
| Layout reference | Setup instructions |
|---|---|
| 1. Go to anon-hl2/bin/ and add both of the .fgd files.
2. Set it to what is most convenient for you. I put them as "info_player_start", and "func_detail", respectively.
3. Set this to be your base anon-hl2 directory. |
When you are done, it should look something like this: (click to expand)
Step 3 - Build Programs
Now that we've gotten our game configuration setup, we need to setup the build programs we will be using later.
First, make sure to select your config from the dropdown menu. The last selected config doesn't carry over between the two windows.
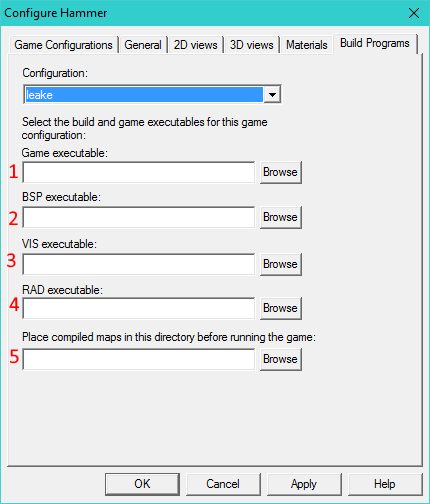
| Layout reference | Setup instructions |
|---|---|
| 1. Go to your base anon-hl2 directory. Then, select "hl2.exe".
2-4. Go to anon-hl2/bin/. Then, in respective order for each, select "vbsp.exe", "vvis.exe", and "vrad.exe". |
Recheck that none of the selected directories in either window end with a slash. It will make your life easier.
Method 2 - Outside Hammer
This method is faster, but can be more difficult to follow.
- Within your hammer's folder (or the main bin folder of the game you are using hammer from), there is a text document named gameconfig.txt. Open this.
- Scroll to the bottom of the config, and place your cursor here:
- Press enter.
- Paste this into the config, without changing your position in the text document:
|}
