Difference between revisions of "Editor's information/Getting Started"
m |
m (Reverted edits by Li zing ling2 (talk) to last revision by Uncanny) (Tag: Rollback) |
||
| Line 1: | Line 1: | ||
| − | + | {{subpage}} | |
| − | + | This guide intends to give you a starting point of how to create content for the VCC Wiki, and for mediawiki-based wikis in general. | |
| − | + | ||
| − | + | ==Making Pages== | |
| − | + | Making pages is weirdly difficult. I blame the hobbyist programmers here (srsly why u do this), but regardless let's figure out how to get this done. | |
| − | + | ||
| − | + | Here's a few ways to do it. | |
| − | < | + | |
| − | + | ===Via the Search Bar=== | |
| − | < | + | This is a little slower, but a little easier. |
| − | + | {| class="wikitable" style="width:800px" | |
| − | < | + | |- |
| − | + | ! Text !! Image | |
| − | + | |- | |
| − | + | |1.Go to the top-right. Click on the search bar, and type the name you want. (As it should look on the page itself! '''Case-sensitive'''.) | |
| − | + | |[[File:Brave 2019-12-25 21-03-42.png|thumb]] | |
| − | + | |- | |
| − | < | + | |2.Then, click on the faded yellow square to search. |
| − | + | ||[[File:Brave 2019-12-25 21-09-51.png|thumb]] | |
| − | < | + | |- |
| + | |3.Now, the page should not exist. It will state, "Create the page "''lorem ipsum''" on this wiki!". Click on that. | ||
| + | ||[[File:Brave 2019-12-25 21-13-02.png|thumb]] | ||
| + | |} | ||
| + | You are done. Continue to the next section for an introduction to the PAGE EDITOR. | ||
| + | ===Via the URL Bar=== | ||
| + | This is slightly harder, but also more simple. | ||
| + | {| class="wikitable" style="width:800px" | ||
| + | |- | ||
| + | ! Text !! Image | ||
| + | |- | ||
| + | |1.Go to the URL bar. Find the name of the article. This is the same as the title of the page, with some underscores. | ||
| + | || [[File:Brave 2019-12-25 21-32-02.png|thumb]] | ||
| + | Click the images to see them fully. | ||
| + | |- | ||
| + | |2.Replace this with your title. Type it in as you'll see it on the page. | ||
| + | || [[File:Tutsimp urlbar3.png|thumb]] | ||
| + | |} | ||
| + | This should cover your article making needs. If it does not, feel free to inquire in #wiki-discussion on the VCC Discord. It can be found here: | ||
| + | [[File:Brave 2019-12-25 21-42-31.png|frame|right]] | ||
| + | |||
| + | ==Formatting in MediaWiki== | ||
| + | Here, I'll cover some elements that may be confusing. | ||
| + | ===Textual formatting=== | ||
| + | ====Why are my separate lines sticking together?==== | ||
| + | You have not put a <code><nowiki><br></nowiki></code> at the end of the offending lines. | ||
| + | |||
| + | You can also hit enter twice at the end for the same effect. | ||
| + | |||
| + | {| class="wikitable" | ||
| + | |- | ||
| + | ! | ||
| + | !Will stick | ||
| + | !Won't stick | ||
| + | |||
| + | |- | ||
| + | | | ||
| + | What you see: | ||
| + | | | ||
| + | <code><nowiki>This is a line.</nowiki></code><br> | ||
| + | <code><nowiki>Another good line.</nowiki></code><br> | ||
| + | <code><nowiki>And yet another, that agrees!</nowiki></code> | ||
| + | || | ||
| + | <code><nowiki>This is a line.</nowiki></code> <br><br> | ||
| + | <code><nowiki>Another good line.</nowiki></code><br><br> | ||
| + | <code><nowiki>And yet another, that agrees!</nowiki></code> | ||
| + | ---- | ||
| + | <code><nowiki>This is a line.<br></nowiki></code> <br> | ||
| + | <code><nowiki>Another good line.<br></nowiki></code><br> | ||
| + | <code><nowiki>And yet another, that agrees!<br></nowiki></code> | ||
| + | |||
| + | |- | ||
| + | |What you get: | ||
| + | | | ||
| + | This is a line. | ||
| + | Another good line. | ||
| + | And yet another, that agrees! | ||
| + | || | ||
| + | This is a line.<br> | ||
| + | Another good line.<br> | ||
| + | And yet another, that agrees! | ||
| + | |} | ||
| + | |||
| + | ====Other==== | ||
| + | The editor supports several diffreent functions. Just select what you want to have formatting, click the desired button, and it will be added: | ||
| + | |||
| + | [[File:brave_2019-12-25_23-18-02.png|400px]] | ||
| + | |||
| + | Beyond the editor, MediaWiki has a language for formatting. This language is best understood through the documentation available: | ||
| + | |||
| + | A good listing of these tags is found here: [https://www.mediawiki.org/wiki/Help:Formatting Help:Formatting] (ext. link) | ||
| + | |||
| + | ===Adding Images=== | ||
| + | This can be done in a few ways. | ||
| + | |||
| + | [[File:brave_2019-12-25_21-54-13.png]] | ||
| + | |||
| + | ====1.Image tool==== | ||
| + | This is a slow way, but it has more features for image-inclusion than the others. | ||
| + | {| class="wikitable" style="width:800px" | ||
| + | |- | ||
| + | ! Text !! Images | ||
| + | |- | ||
| + | | 1.Click on the picture frame in the editor. || [[File:brave_2019-12-25_21-57-56.png|thumb]] | ||
| + | |- | ||
| + | | 2.Click the "upload" at the bottom-left. || [[File:Brave 2019-12-25 22-00-31.png|thumb]] | ||
| + | |- | ||
| + | | 3.Find the appropriate image, and upload it. Then, check the box. || [[File:Brave 2019-12-25 22-01-04.png|thumb]] | ||
| + | |- | ||
| + | | 4.You may wish to change the name. You must add a description. || [[File:brave_2019-12-25_22-01-37.png|thumb]] | ||
| + | |- | ||
| + | | 5.Finally, you can change the alignment, size, and inclusion of the image. || [[File:brave_2019-12-25_22-06-26.png|thumb]] | ||
| + | |} | ||
| + | ====2.MsUpload==== | ||
| + | MsUpload is a useful and more efficient tool for image upload & placement, but it has fewer options, often requiring more work afterwards. | ||
| + | {| class="wikitable" style="width:800px" | ||
| + | |- | ||
| + | ! Text !! Images | ||
| + | |- | ||
| + | | 1.Click on the blue uploading icon. Then, select an image. || [[File:brave_2019-12-25_22-11-04.png|400px]] | ||
| + | |- | ||
| + | | 2.Your image will appear below the "Drop files here" row. Click on "Upload this file". || [[File:Brave 2019-12-25 22-00-31.png|thumb]] | ||
| + | |- | ||
| + | | 3.You can now include the image. It is generally best to use "Insert as image". The image will be placed where the cursor is. || [[File:Brave_2019-12-25_22-15-26.png|thumb]] | ||
| + | |} | ||
| + | The resultant text may require some modification. | ||
| + | |||
| + | The image-adder previously covered can be used to apply these options, when the filename is placed in the "Filename:" space. | ||
| + | |||
| + | ====3.MsUpload For Galleries==== | ||
| + | MsUpload can also be used to add galleries quickly and conveniently. To do so, we will utilize the "drop files here" box previously circled. | ||
| + | {| class="wikitable" style="width:800px" | ||
| + | |- | ||
| + | ! Text !! Images | ||
| + | |- | ||
| + | | 1.Drop the desired files into the drop files. It helps to have the files in one place to drag them all in.|| | ||
| + | [[File:Tutsimp msgallery 1.png|thumb]] | ||
| + | |||
| + | |- | ||
| + | | 2.Your images will appear below the "Drop files here" row. Click on "Upload all files". || [[File:brave_2019-12-26_12-11-50.png|thumb]] | ||
| + | |- | ||
| + | | 3.You can now add in your gallery. Click "Insert all as gallery". Wherever your cursor currently is will have the gallery placed there. || [[File:brave_2019-12-26_12-12-43.png|thumb]] | ||
| + | |} | ||
| + | Wonder how galleries work? Continue into the section below. | ||
| + | |||
| + | Further clarification: [https://www.mediawiki.org/wiki/Help:Images Help:Images] (ext. link) | ||
| + | ===Galleries=== | ||
| + | Galleries look like this: | ||
| + | <gallery> | ||
| + | Armor_concept1.jpg|Medic man (I like him)<!-- it's not --> | ||
| + | Medic_concept_1.jpg|Wait no it's this guy sorry | ||
| + | </gallery> | ||
| + | |||
| + | Inside the editor, they look like this: | ||
| + | |||
| + | <code> | ||
| + | |||
| + | <nowiki><gallery></nowiki> | ||
| + | |||
| + | <nowiki>Armor_concept1.jpg|Medic man (I like him) <!-- it's not --></nowiki> | ||
| + | |||
| + | <nowiki>Medic_concept_1.jpg|Wait no it's this guy sorry</nowiki> | ||
| + | |||
| + | <nowiki></gallery></nowiki> | ||
| + | |||
| + | </code> | ||
| + | |||
| + | {| class="wikitable" | ||
| + | |- | ||
| + | |They can be added here:|| [[File:Brave 2019-12-25 22-28-18.png|450px|]] | ||
| + | |} | ||
| + | |||
| + | Everything before the pipe symbol is the filename of the image. Everything after is the caption, if any. | ||
| + | |||
| + | You can add more rows to the gallery by adding another line. | ||
| + | |||
| + | Further clarification: [https://www.mediawiki.org/wiki/Help:Images#Rendering_a_gallery_of_images Help:Images] (ext. link) | ||
| + | ===Lists=== <!-- at this moment i began to realize I was redundant --> | ||
| + | {| class="wikitable" | ||
| + | |- | ||
| + | |They can be added here:|| [[File:brave_2019-12-25_22-36-56.png|450px]] | ||
| + | |} | ||
| + | |||
| + | For specialized usage, please see: [https://www.mediawiki.org/wiki/Help:Formatting Help: Formatting] (ext. link) | ||
| + | |||
| + | ===Tables=== | ||
| + | {| class="wikitable" | ||
| + | |- | ||
| + | |They can be added here, with some useful preset options:|| [[File:brave_2019-12-25_22-39-07.png|450px]] | ||
| + | |} | ||
| + | |||
| + | For clarification and specialized usage, please see: [https://www.mediawiki.org/wiki/Help:Tables Help:Tables] (ext. link) | ||
| + | |||
| + | ---- | ||
| + | Return to [[Editor's information]] for other information. | ||
Latest revision as of 07:17, 8 October 2021
This is a sub-page of Editor's information.
This guide intends to give you a starting point of how to create content for the VCC Wiki, and for mediawiki-based wikis in general.
Contents
Making Pages
Making pages is weirdly difficult. I blame the hobbyist programmers here (srsly why u do this), but regardless let's figure out how to get this done.
Here's a few ways to do it.
Via the Search Bar
This is a little slower, but a little easier.
| Text | Image |
|---|---|
| 1.Go to the top-right. Click on the search bar, and type the name you want. (As it should look on the page itself! Case-sensitive.) | |
| 2.Then, click on the faded yellow square to search. | |
| 3.Now, the page should not exist. It will state, "Create the page "lorem ipsum" on this wiki!". Click on that. |


You are done. Continue to the next section for an introduction to the PAGE EDITOR.
Via the URL Bar
This is slightly harder, but also more simple.
| Text | Image |
|---|---|
| 1.Go to the URL bar. Find the name of the article. This is the same as the title of the page, with some underscores. |
Click the images to see them fully. |
| 2.Replace this with your title. Type it in as you'll see it on the page. |
This should cover your article making needs. If it does not, feel free to inquire in #wiki-discussion on the VCC Discord. It can be found here:

Formatting in MediaWiki
Here, I'll cover some elements that may be confusing.
Textual formatting
Why are my separate lines sticking together?
You have not put a <br> at the end of the offending lines.
You can also hit enter twice at the end for the same effect.
| Will stick | Won't stick | |
|---|---|---|
|
What you see: |
|
|
| What you get: |
This is a line. Another good line. And yet another, that agrees! |
This is a line. |
Other
The editor supports several diffreent functions. Just select what you want to have formatting, click the desired button, and it will be added:

Beyond the editor, MediaWiki has a language for formatting. This language is best understood through the documentation available:
A good listing of these tags is found here: Help:Formatting (ext. link)
Adding Images
This can be done in a few ways.

1.Image tool
This is a slow way, but it has more features for image-inclusion than the others.
| Text | Images |
|---|---|
| 1.Click on the picture frame in the editor. | |
| 2.Click the "upload" at the bottom-left. | |
| 3.Find the appropriate image, and upload it. Then, check the box. | |
| 4.You may wish to change the name. You must add a description. | |
| 5.Finally, you can change the alignment, size, and inclusion of the image. |


2.MsUpload
MsUpload is a useful and more efficient tool for image upload & placement, but it has fewer options, often requiring more work afterwards.
| Text | Images |
|---|---|
| 1.Click on the blue uploading icon. Then, select an image. | 
|
| 2.Your image will appear below the "Drop files here" row. Click on "Upload this file". | |
| 3.You can now include the image. It is generally best to use "Insert as image". The image will be placed where the cursor is. |

The resultant text may require some modification.
The image-adder previously covered can be used to apply these options, when the filename is placed in the "Filename:" space.
3.MsUpload For Galleries
MsUpload can also be used to add galleries quickly and conveniently. To do so, we will utilize the "drop files here" box previously circled.
| Text | Images |
|---|---|
| 1.Drop the desired files into the drop files. It helps to have the files in one place to drag them all in. | |
| 2.Your images will appear below the "Drop files here" row. Click on "Upload all files". | |
| 3.You can now add in your gallery. Click "Insert all as gallery". Wherever your cursor currently is will have the gallery placed there. |


Wonder how galleries work? Continue into the section below.
Further clarification: Help:Images (ext. link)
Galleries
Galleries look like this:
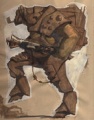
Medic man (I like him)
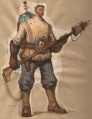
Wait no it's this guy sorry


Inside the editor, they look like this:
<gallery>
Armor_concept1.jpg|Medic man (I like him) <!-- it's not -->
Medic_concept_1.jpg|Wait no it's this guy sorry
</gallery>
| They can be added here: | 
|
Everything before the pipe symbol is the filename of the image. Everything after is the caption, if any.
You can add more rows to the gallery by adding another line.
Further clarification: Help:Images (ext. link)
Lists
| They can be added here: | 
|
For specialized usage, please see: Help: Formatting (ext. link)
Tables
| They can be added here, with some useful preset options: | 
|
For clarification and specialized usage, please see: Help:Tables (ext. link)
Return to Editor's information for other information.