Difference between revisions of "GLaDOS (Evolution)"
(retail section) |
BlanketOfOne (talk | contribs) |
||
| (11 intermediate revisions by 6 users not shown) | |||
| Line 1: | Line 1: | ||
| − | Throughout Portal's 2 years of development, the ending was changed quite a number of times, going from a simple escape from an abandoned facility to a battle against a floating cube of rollermines before its final rendition of a giant feminine | + | Throughout Portal's 2 years of development, the ending, and its boss, GLaDOS, was changed quite a number of times, going from a simple escape from an abandoned facility to a battle against a floating cube of rollermines before its final rendition of a giant feminine AI supercomputer. This page aims to explain and display all the known eras, screenshots, and other such information concerning GLaDOS and the escape throughout Portal 1's development, as well as her appearance in Portal's followups. |
| − | == Prospekt Era | + | |
| + | == Version 0: Pre-GLaDOS / Nova Prospekt Era (lab_lvl3a) == | ||
Prior to the conceptualization of the Aperture Science Computer-Aided Enrichment Center, the story followed an unnamed test subject through a Nova Prospekt-esque facility. What is presumably the final level of this era of development, referred to as the "Prospekt Era," is found in the Portal 1 leaked mappack, titled "lab_lvl3a." This gauntlet of mini-challenges has the player going throughout the behind-the-scenes areas of the facility in order to locate 4 car batteries in order to restore the power to the facility and unlock the front door. | Prior to the conceptualization of the Aperture Science Computer-Aided Enrichment Center, the story followed an unnamed test subject through a Nova Prospekt-esque facility. What is presumably the final level of this era of development, referred to as the "Prospekt Era," is found in the Portal 1 leaked mappack, titled "lab_lvl3a." This gauntlet of mini-challenges has the player going throughout the behind-the-scenes areas of the facility in order to locate 4 car batteries in order to restore the power to the facility and unlock the front door. | ||
=== Noteworthy points === | === Noteworthy points === | ||
| Line 25: | Line 26: | ||
</gallery> | </gallery> | ||
| − | == | + | == Version 1: Laser Turret == |
| − | Following the creation of Aperture Science, the first rendition of | + | Following the creation of Aperture Science, the first rendition of GLaDOS involved the use of the cut "Laser turrets" (later turned into the rocket turrets.) This fight saw temp GLaDOS as a cube made out of refracting glass being powered by 4 generator plugs. The player would need to redirect lasers from the laser turrets into these plugs in order to destroy them, thus killing GLaDOS in the process. This rendition was found to be too boring for testers. |
=== Noteworthy points === | === Noteworthy points === | ||
* Although for years, there were only 2 images of this fight, in low quality, a third was recently found, as well as full resolution versions of the original two images, in Portal's Postmortem GDC showcase. | * Although for years, there were only 2 images of this fight, in low quality, a third was recently found, as well as full resolution versions of the original two images, in Portal's Postmortem GDC showcase. | ||
| Line 34: | Line 35: | ||
File:Portalbeta012.jpg|The first image of the laser training. | File:Portalbeta012.jpg|The first image of the laser training. | ||
File:Laserturrettraining2.jpg|Ditto, after destroying the orange plug. | File:Laserturrettraining2.jpg|Ditto, after destroying the orange plug. | ||
| − | File:Portalbeta01234.jpg|The first rendition of | + | File:Portalbeta01234.jpg|The first rendition of GLaDOS. |
</gallery> | </gallery> | ||
| − | == | + | == Version 2: Rocket Turret == |
| − | The second rendition of | + | The second rendition of GLaDOS saw a slight redesign as a cube made up of rollermines as opposed to glass. This fight with her was amped up as a complex brawl with her "brain" which would move around while the player was attempting to redirect missiles at it. Pillboxes would also open up at random intervals around the arena with turrets on the inside. This version was scrapped due to being too action-oriented, as players would ignore GLaDOS as she was rising up in the room in order to pay attention to the turrets opening up in the surrounding pillboxes. |
=== Noteworthy points === | === Noteworthy points === | ||
| − | * This is the first version of the | + | * This is the first version of the GLaDOS fight to introduce the Pillbox room, a room that made it into the final game. |
| − | * Leftovers for the randomly opening Pillboxes are found on the 2006 vmf of Escape_01, proving that the | + | * Leftovers for the randomly opening Pillboxes are found on the 2006 vmf of Escape_01, proving that the GLaDOS fight was initially found on this map before being moved to its own. |
=== Gallery === | === Gallery === | ||
<gallery> | <gallery> | ||
| Line 48: | Line 49: | ||
</gallery> | </gallery> | ||
| − | == | + | == Version 3: Chase Sequence (escape_01) == |
| − | The third version of | + | The third version of GLaDOS was built upon the second version, and includes much of the same elements. The defining difference between these versions is that, while Version 2 was exclusive to the Pillbox room, Version 3 includes a chase sequence and a final confrontation. There are two separate versions of the V3 GLaDOS fight, one of which can be found in the 2006 vmfs without any necessary modifications, and the other being found within an unused visgroup of the 2006 version of escape_01, titled "steaming refuse." |
| − | This version of the V3 fight starts out the same as its later version, but, as opposed to the long chase sequence found in the leaked version, the chase sequence in steaming refuse is much shorter, and, as opposed to | + | This version of the V3 fight starts out the same as its later version, but, as opposed to the long chase sequence found in the leaked version, the chase sequence in steaming refuse is much shorter, and, as opposed to GLaDOS only taking 3 hits in the leaked version, she takes 4 in this. The level ends with a wall breaking open allowing the player to leave the facility through a Portal. |
Although the level is split up and cannot be played normally, a recreation can be found [https://www.youtube.com/watch?v=GOVqklMVqqk here.] | Although the level is split up and cannot be played normally, a recreation can be found [https://www.youtube.com/watch?v=GOVqklMVqqk here.] | ||
=== Noteworthy points === | === Noteworthy points === | ||
| Line 59: | Line 60: | ||
=== Gallery === | === Gallery === | ||
<gallery> | <gallery> | ||
| − | File:old_escape_010000.jpg| The first piece from Steaming Refuse - A Hallway that opens up after | + | File:old_escape_010000.jpg| The first piece from Steaming Refuse - A Hallway that opens up after GLaDOS takes 2 damage. |
File:old_escape_010001.jpg| Ditto, with the ceiling open and turrets having been deployed with claws. This concept was used in the final game. | File:old_escape_010001.jpg| Ditto, with the ceiling open and turrets having been deployed with claws. This concept was used in the final game. | ||
File:old_escape_010002.jpg| the corner junction where rockets have to be redirected. | File:old_escape_010002.jpg| the corner junction where rockets have to be redirected. | ||
File:old_escape_010003.jpg| The two rocket turrets found at the end of the hallway. Originally, these were found on top of brush pedestals. | File:old_escape_010003.jpg| The two rocket turrets found at the end of the hallway. Originally, these were found on top of brush pedestals. | ||
| − | File:old_escape_010004.jpg| | + | File:old_escape_010004.jpg| GLaDOS' brain at the end of the opposite hallway. Please note that the glass texture was added in by the map creator and likely not an accurate representation. |
| − | File:old_escape_010005.jpg| | + | File:old_escape_010005.jpg| GLaDOS having risen to the top of the room after receiving her third shot of damage. |
File:old_escape_010006.jpg| Ditto, alternate angle. | File:old_escape_010006.jpg| Ditto, alternate angle. | ||
| − | File:old_escape_010007.jpg| The crack in the wall that opens up after defeating | + | File:old_escape_010007.jpg| The crack in the wall that opens up after defeating GLaDOS. |
File:old_escape_010008.jpg| The room that the player portals into through said crack. | File:old_escape_010008.jpg| The room that the player portals into through said crack. | ||
File:old_escape_010009.jpg| outside the facility, including the 3d Skybox that is normally not visible at the bottom. | File:old_escape_010009.jpg| outside the facility, including the 3d Skybox that is normally not visible at the bottom. | ||
</gallery> | </gallery> | ||
| − | == | + | == Version 3.5: Chase Sequence (escape_02) == |
| − | This rendition of the | + | This rendition of the GLaDOS fight is found inside the 2006 leak vmf folder, being the 2006 version of "Escape_02." The start of this fight is very similar to its previous rendition, with the divergence taking place in the chase sequence. Whereas the Steaming Refuse version of the fight has a relatively short chase sequence, the leak version is incredibly long and features an entirely new room at the end filled with even more turrets. The reason for Version 3 being cut is due to its poor pacing, necessity for a large number of new art assets, and poorly balanced gameplay. |
=== Noteworthy points === | === Noteworthy points === | ||
| − | * The cubby that | + | * The cubby that GLaDOS hides in in the final room uses model materials, which will not load properly in hammer unless a modified version is used. |
* The old 3d skybox from the steaming refuse version is left in this map, being far away from where the actual exit is. | * The old 3d skybox from the steaming refuse version is left in this map, being far away from where the actual exit is. | ||
| − | * The map logic for | + | * The map logic for GLaDOS taking 4 hits of damage is still in the vmf, but the final hit executes the logic for hits 3 and 4 at the same time. |
* The Portal GDC Postmortem showcases screenshots of a slightly different version of the map than the one found in the leak. | * The Portal GDC Postmortem showcases screenshots of a slightly different version of the map than the one found in the leak. | ||
=== Gallery === | === Gallery === | ||
<gallery> | <gallery> | ||
File:escape_020002.jpg| The Pillbox Room | File:escape_020002.jpg| The Pillbox Room | ||
| − | File:escape_020005.jpg| The first Hallway | + | File:escape_020005.jpg| The first Hallway GLaDOS runs to after leaving the Pillbox Room |
File:escape_020006.jpg| Ditto, with pieces of the ceiling having fallen off | File:escape_020006.jpg| Ditto, with pieces of the ceiling having fallen off | ||
File:escape_020008.jpg| The Second Hallway, with two turrets placed down in front of the player and both pistons up | File:escape_020008.jpg| The Second Hallway, with two turrets placed down in front of the player and both pistons up | ||
| Line 90: | Line 91: | ||
File:escape_020013.jpg| The final confrontation room | File:escape_020013.jpg| The final confrontation room | ||
File:escape_020015.jpg| Ditto, with the rocket turret (out of shot) and turrets activated | File:escape_020015.jpg| Ditto, with the rocket turret (out of shot) and turrets activated | ||
| − | File:escape_020016.jpg| The cubby that | + | File:escape_020016.jpg| The cubby that GLaDOS hides in |
| − | File:escape_020017.jpg| Liquid Portal flooding the room after | + | File:escape_020017.jpg| Liquid Portal flooding the room after GLaDOS is defeated |
File:escape_020020.jpg| The Cave the player is teleported to after being submerged in Liquid Portal | File:escape_020020.jpg| The Cave the player is teleported to after being submerged in Liquid Portal | ||
File:escape_020021.jpg| The Exit Platform | File:escape_020021.jpg| The Exit Platform | ||
| Line 97: | Line 98: | ||
</gallery> | </gallery> | ||
| − | == | + | == Concept == |
| − | This rendition of | + | Although the concept of a machine looking down from the ceiling was almost always present for GLaDOS, what her body would look like changed a number of times. Here is her concept art: |
| + | <gallery> | ||
| + | File:1 ring glados.jpg|An early version of GLaDOS featuring a single ring | ||
| + | File:red glados.png|A more round version of GLaDOS featuring a lot of red lights | ||
| + | File:birth of venus full.jpg|The full concept art for the "birth of venus" GLaDOS | ||
| + | File:feminine glados.png|A fully black GLaDOS, featuring more feminine features | ||
| + | File:final glados.jpg|Concept art for the final GLaDOS and her entire generator | ||
| + | File:GLaDOS_Mousepad.png|Concept art of final GLaDOS from a mousepad | ||
| + | File:glados_chamber2.jpg|GLaDOS featured in her chamber | ||
| + | </gallery> | ||
| + | |||
| + | == Version 4: Central AI Chamber (proto_escape/styleguide_escape_02) == | ||
| + | This rendition of GLaDOS is almost identical to her final form, with the differences being mostly a matter of details and minor balancing. Because Proto_Escape and Styleguide_escape_02 are nearly identical to one another, they will be marked as a single version for the sake of time for this article. | ||
=== Noteworthy points === | === Noteworthy points === | ||
| − | * There are both brush and model visgroups in these maps for | + | * There are both brush and model visgroups in these maps for GLaDOS' generator. |
** Said Generator once used a single model for the spinning parts as opposed to 4 separate models. This was changed in the final so that the different rotating generator parts can have slightly different sizes to one another. | ** Said Generator once used a single model for the spinning parts as opposed to 4 separate models. This was changed in the final so that the different rotating generator parts can have slightly different sizes to one another. | ||
* The rocket turret is in a different location to retail. | * The rocket turret is in a different location to retail. | ||
| Line 106: | Line 119: | ||
* Despite the fact that the desks have not been implemented, there is still a table with the emergency phone, showcasing how important it was as a plotpoint to the developers. In the final game, this plot point is only mentioned in the dev commentary. | * Despite the fact that the desks have not been implemented, there is still a table with the emergency phone, showcasing how important it was as a plotpoint to the developers. In the final game, this plot point is only mentioned in the dev commentary. | ||
* All of the cores except for the anger core were finalized at this point. In both versions of the map, the anger core is not present, instead using another morality core. | * All of the cores except for the anger core were finalized at this point. In both versions of the map, the anger core is not present, instead using another morality core. | ||
| − | ** Interestingly, all cores on | + | ** Interestingly, all cores on GLaDOS are morality cores until being knocked off. |
| − | * | + | * GLaDOS is a static prop in these maps. This was changed in the final so that she could swing around and attempt to dodge the oncoming rockets. |
=== Gallery === | === Gallery === | ||
| − | |||
<gallery> | <gallery> | ||
File:20210426134720_1.jpg|The Pillbox room, this time with fancy new doors. | File:20210426134720_1.jpg|The Pillbox room, this time with fancy new doors. | ||
File:20210426134740_1.jpg|Ditto, with said doors open. | File:20210426134740_1.jpg|Ditto, with said doors open. | ||
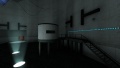
| − | File:20210426134807_1.jpg|The hallway past the pillbox room that overlooks | + | File:20210426134807_1.jpg|The hallway past the pillbox room that overlooks GLaDOS' chamber. |
File:20210426134812_1.jpg|The observation deck, using models that are not found in the final game. The light is flickering in this version. | File:20210426134812_1.jpg|The observation deck, using models that are not found in the final game. The light is flickering in this version. | ||
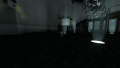
| − | File:20210426134819_1.jpg|The hallway leading into | + | File:20210426134819_1.jpg|The hallway leading into GLaDOS' chamber, completely dark. |
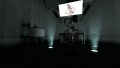
| − | File:20210426134830_1.jpg| | + | File:20210426134830_1.jpg|GLaDOS' chamber, with the emergency phone visible. |
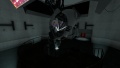
| − | File:20210426134834_1.jpg| | + | File:20210426134834_1.jpg|GLaDOS, including her temporary brush models throughout her chamber. |
File:20210426134937_1.jpg|The temp incinerator. In styleguide_escape_02, this incinerator has a window on it, likely caused by a compile error. | File:20210426134937_1.jpg|The temp incinerator. In styleguide_escape_02, this incinerator has a window on it, likely caused by a compile error. | ||
| − | File:20210426134959_1.jpg| The brush observation deck with the incinerator button inside of it. | + | File:20210426134959_1.jpg|The brush observation deck with the incinerator button inside of it. |
| − | File:20210426135036_1.jpg| | + | File:20210426135036_1.jpg|GLaDOS' back, showcasing how all of the cores use the morality core skin when attached. |
| − | File:20210426135050_1.jpg| The singular rocket turret. | + | File:20210426135050_1.jpg|The singular rocket turret. |
</gallery> | </gallery> | ||
| − | == Final | + | == Version 5: Final == |
| − | This is the | + | This is the GLaDOS that shipped with the final product. Other than additional dialogue, models in place of their brush counter parts, and an ending sequence, she is nearly identical to her previous counterpart. |
=== Noteworthy Points === | === Noteworthy Points === | ||
* The rocket turret has been moved from its original location | * The rocket turret has been moved from its original location | ||
* The final core is now the anger core | * The final core is now the anger core | ||
| − | * | + | * GLaDOS shakes around during the later portion of the fight, making it slightly more difficult to aim rockets at her. |
| − | == Gallery == | + | === Gallery === |
<gallery> | <gallery> | ||
File:20210426142725_1.jpg|The Pillbox room, now with model doors | File:20210426142725_1.jpg|The Pillbox room, now with model doors | ||
| Line 140: | Line 152: | ||
File:20210426151736_1.jpg|The hut, now as a model | File:20210426151736_1.jpg|The hut, now as a model | ||
</gallery> | </gallery> | ||
| + | |||
| + | [[Category:Portal]] | ||
| + | [[Category:Evolution]] | ||
Latest revision as of 07:51, 7 January 2023
Throughout Portal's 2 years of development, the ending, and its boss, GLaDOS, was changed quite a number of times, going from a simple escape from an abandoned facility to a battle against a floating cube of rollermines before its final rendition of a giant feminine AI supercomputer. This page aims to explain and display all the known eras, screenshots, and other such information concerning GLaDOS and the escape throughout Portal 1's development, as well as her appearance in Portal's followups.
Contents
Version 0: Pre-GLaDOS / Nova Prospekt Era (lab_lvl3a)
Prior to the conceptualization of the Aperture Science Computer-Aided Enrichment Center, the story followed an unnamed test subject through a Nova Prospekt-esque facility. What is presumably the final level of this era of development, referred to as the "Prospekt Era," is found in the Portal 1 leaked mappack, titled "lab_lvl3a." This gauntlet of mini-challenges has the player going throughout the behind-the-scenes areas of the facility in order to locate 4 car batteries in order to restore the power to the facility and unlock the front door.
Noteworthy points
Lab_lvl3a contains the most Prospekt-era content of any leaked map due to it being an actual full map from the era. With this, the map file contains portions of 3 separate era chambers, chambers 0, 13, and 18, as well as the nomenclature for said chambers. What is interesting about this, is that, although chambers 0 and 13 use logically sound names (intro_lvl and intro_lvl7,) Chamber 18 is an outlier and a conundrum in itself, having a name that would place it past this level (lab_lvl4.) There are a plethora of theories behind the reason for this name, ranging from that the map was conceptualized after the creation of lab_lvl3a to that lab_lvl3a wasn't actually the final escape map and that the exit would have looped back around. For the time being, however, there is no definitive evidence behind any of this, and, with how bizarre some map names for Prospekt-era Portal are, it may very well just be coincidental.
Gallery
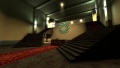
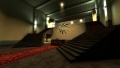
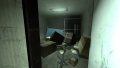
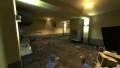
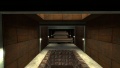
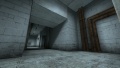
The offices, the first section of the map, found before returning auxiliary power.
Ditto, with the power restored.
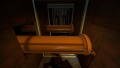
The battery found inside one of the office rooms.
The Aperture logo before any batteries have been found.
Ditto, with 1 battery.

Ditto, 2 batteries.
Ditto, all 3 batteries.
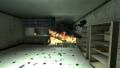
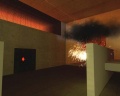
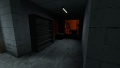
The Kitchen, set ablaze by a turret and broken gas pipe.
The lounge, located directly next to the kitchen, also on fire.
The storage closet located next to the lounge.
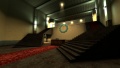
Test Chamber 0's observation deck.

Ditto, Chamber 13.
Ditto, Chamber 18.
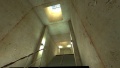
The broken ceiling in Chamber 18's deck, allowing the player to access another office.
Said office.
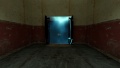
The fizzlers past the front desk's doors. Note that, although the models are correct, they are using the incorrect textures, as their originals have been lost.
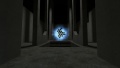
Freedom.


Version 1: Laser Turret
Following the creation of Aperture Science, the first rendition of GLaDOS involved the use of the cut "Laser turrets" (later turned into the rocket turrets.) This fight saw temp GLaDOS as a cube made out of refracting glass being powered by 4 generator plugs. The player would need to redirect lasers from the laser turrets into these plugs in order to destroy them, thus killing GLaDOS in the process. This rendition was found to be too boring for testers.
Noteworthy points
- Although for years, there were only 2 images of this fight, in low quality, a third was recently found, as well as full resolution versions of the original two images, in Portal's Postmortem GDC showcase.
- Although Laser turrets were replaced outright by rocket turrets, some functions of their abilities still exist, especially including the ability to redirect env_laser entities through portals. Said entities can also be used to destroy turrets much in the same way as Portal 2.
Gallery

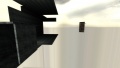
The first image of the laser training.
Ditto, after destroying the orange plug.
The first rendition of GLaDOS.


Version 2: Rocket Turret
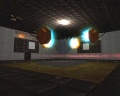
The second rendition of GLaDOS saw a slight redesign as a cube made up of rollermines as opposed to glass. This fight with her was amped up as a complex brawl with her "brain" which would move around while the player was attempting to redirect missiles at it. Pillboxes would also open up at random intervals around the arena with turrets on the inside. This version was scrapped due to being too action-oriented, as players would ignore GLaDOS as she was rising up in the room in order to pay attention to the turrets opening up in the surrounding pillboxes.
Noteworthy points
- This is the first version of the GLaDOS fight to introduce the Pillbox room, a room that made it into the final game.
- Leftovers for the randomly opening Pillboxes are found on the 2006 vmf of Escape_01, proving that the GLaDOS fight was initially found on this map before being moved to its own.
Gallery
One of the two surviving images of this fight.
Ditto


Version 3: Chase Sequence (escape_01)
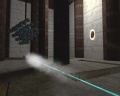
The third version of GLaDOS was built upon the second version, and includes much of the same elements. The defining difference between these versions is that, while Version 2 was exclusive to the Pillbox room, Version 3 includes a chase sequence and a final confrontation. There are two separate versions of the V3 GLaDOS fight, one of which can be found in the 2006 vmfs without any necessary modifications, and the other being found within an unused visgroup of the 2006 version of escape_01, titled "steaming refuse." This version of the V3 fight starts out the same as its later version, but, as opposed to the long chase sequence found in the leaked version, the chase sequence in steaming refuse is much shorter, and, as opposed to GLaDOS only taking 3 hits in the leaked version, she takes 4 in this. The level ends with a wall breaking open allowing the player to leave the facility through a Portal. Although the level is split up and cannot be played normally, a recreation can be found here.
Noteworthy points
- Steaming Refuse has leftovers of the laser turret before it was redesigned.
- Interestingly enough, nomenclature refers to the turrets both as laser AND rocket turrets. The reason for this inconsistent nomenclature is unknown.
- The room that the player escapes into is seen on several other test maps.
- The level contains a 3d skybox that cannot be seen normally. This is likely because the skybox overlaps with several visleafs for earlier parts of the map and appears awkward at most angles.
Gallery
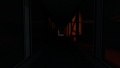
The first piece from Steaming Refuse - A Hallway that opens up after GLaDOS takes 2 damage.
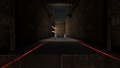
Ditto, with the ceiling open and turrets having been deployed with claws. This concept was used in the final game.
the corner junction where rockets have to be redirected.
The two rocket turrets found at the end of the hallway. Originally, these were found on top of brush pedestals.
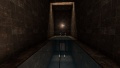
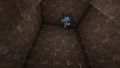
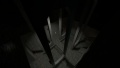
GLaDOS' brain at the end of the opposite hallway. Please note that the glass texture was added in by the map creator and likely not an accurate representation.
GLaDOS having risen to the top of the room after receiving her third shot of damage.
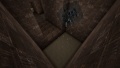
Ditto, alternate angle.
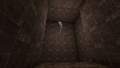
The crack in the wall that opens up after defeating GLaDOS.
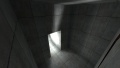
The room that the player portals into through said crack.

outside the facility, including the 3d Skybox that is normally not visible at the bottom.


Version 3.5: Chase Sequence (escape_02)
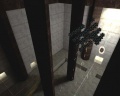
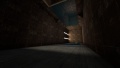
This rendition of the GLaDOS fight is found inside the 2006 leak vmf folder, being the 2006 version of "Escape_02." The start of this fight is very similar to its previous rendition, with the divergence taking place in the chase sequence. Whereas the Steaming Refuse version of the fight has a relatively short chase sequence, the leak version is incredibly long and features an entirely new room at the end filled with even more turrets. The reason for Version 3 being cut is due to its poor pacing, necessity for a large number of new art assets, and poorly balanced gameplay.
Noteworthy points
- The cubby that GLaDOS hides in in the final room uses model materials, which will not load properly in hammer unless a modified version is used.
- The old 3d skybox from the steaming refuse version is left in this map, being far away from where the actual exit is.
- The map logic for GLaDOS taking 4 hits of damage is still in the vmf, but the final hit executes the logic for hits 3 and 4 at the same time.
- The Portal GDC Postmortem showcases screenshots of a slightly different version of the map than the one found in the leak.
Gallery
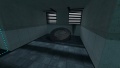
The Pillbox Room
The first Hallway GLaDOS runs to after leaving the Pillbox Room

Ditto, with pieces of the ceiling having fallen off
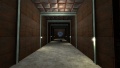
The Second Hallway, with two turrets placed down in front of the player and both pistons up
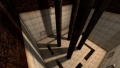
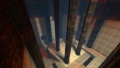
The third Hallway
Ditto, with all pistons extended

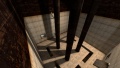
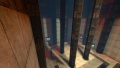
The final Hallway
Ditto, with all pistons extended
The final confrontation room
Ditto, with the rocket turret (out of shot) and turrets activated
The cubby that GLaDOS hides in
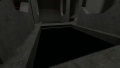
Liquid Portal flooding the room after GLaDOS is defeated
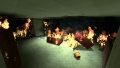
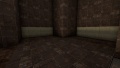
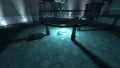
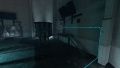
The Cave the player is teleported to after being submerged in Liquid Portal
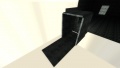
The Exit Platform
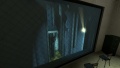
The 3d skybox from Steaming Refuse visible in the distance


Concept
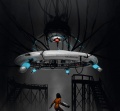
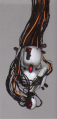
Although the concept of a machine looking down from the ceiling was almost always present for GLaDOS, what her body would look like changed a number of times. Here is her concept art:
An early version of GLaDOS featuring a single ring
A more round version of GLaDOS featuring a lot of red lights
The full concept art for the "birth of venus" GLaDOS

A fully black GLaDOS, featuring more feminine features
Concept art for the final GLaDOS and her entire generator

Concept art of final GLaDOS from a mousepad
GLaDOS featured in her chamber


Version 4: Central AI Chamber (proto_escape/styleguide_escape_02)
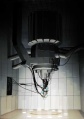
This rendition of GLaDOS is almost identical to her final form, with the differences being mostly a matter of details and minor balancing. Because Proto_Escape and Styleguide_escape_02 are nearly identical to one another, they will be marked as a single version for the sake of time for this article.
Noteworthy points
- There are both brush and model visgroups in these maps for GLaDOS' generator.
- Said Generator once used a single model for the spinning parts as opposed to 4 separate models. This was changed in the final so that the different rotating generator parts can have slightly different sizes to one another.
- The rocket turret is in a different location to retail.
- One of the few noticeable differences between Proto_escape and styleguide_escape_02 are that the styleguide version contains a window on the incinerator. Interestingly, this is not present in the vmf, meaning that it is likely a compile error.
- Despite the fact that the desks have not been implemented, there is still a table with the emergency phone, showcasing how important it was as a plotpoint to the developers. In the final game, this plot point is only mentioned in the dev commentary.
- All of the cores except for the anger core were finalized at this point. In both versions of the map, the anger core is not present, instead using another morality core.
- Interestingly, all cores on GLaDOS are morality cores until being knocked off.
- GLaDOS is a static prop in these maps. This was changed in the final so that she could swing around and attempt to dodge the oncoming rockets.
Gallery
The Pillbox room, this time with fancy new doors.
Ditto, with said doors open.
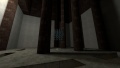
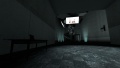
The hallway past the pillbox room that overlooks GLaDOS' chamber.
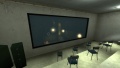
The observation deck, using models that are not found in the final game. The light is flickering in this version.
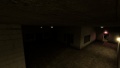
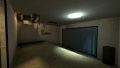
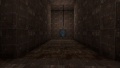
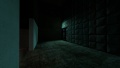
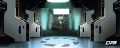
The hallway leading into GLaDOS' chamber, completely dark.
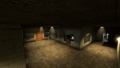
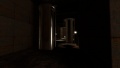
GLaDOS' chamber, with the emergency phone visible.
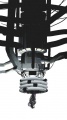
GLaDOS, including her temporary brush models throughout her chamber.

The temp incinerator. In styleguide_escape_02, this incinerator has a window on it, likely caused by a compile error.
The brush observation deck with the incinerator button inside of it.
GLaDOS' back, showcasing how all of the cores use the morality core skin when attached.
The singular rocket turret.


Version 5: Final
This is the GLaDOS that shipped with the final product. Other than additional dialogue, models in place of their brush counter parts, and an ending sequence, she is nearly identical to her previous counterpart.
Noteworthy Points
- The rocket turret has been moved from its original location
- The final core is now the anger core
- GLaDOS shakes around during the later portion of the fight, making it slightly more difficult to aim rockets at her.
Gallery
The Pillbox room, now with model doors
Ditto, with the doors open

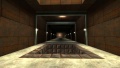
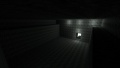
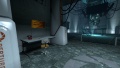
The hallway leading to her chamber
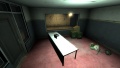
The desk area, complete with the emergency phone
The Incinerator
The Morality core on the ground. Note that the other cores now use their correct models
The hut, now as a model


